Tuesday, August 31, 2010

The Frenck Kiss

French Kiss.jpg

So are yo still blogging thesedays??? hmm thats a question i've been asked by many, from the time i had my bundle of joy in last august. And amist all the laughter the cries the sleepless nights and loads of diapers that comes with the bundle, all i could manange was to get a few clicks once in a while. And well with this blog post i am by no means implying that i gonna be the come back kid on blogosphere. So for now its gonna be the same "on-again off-again" story happening on this blog. How frank... ;) And coming back to this post... its a mocktail (the non-acaholic twin of cocktail) that i made as a welcome drink for my son's birthday party.

Tuesday, May 11, 2010

Kumquat Pudding

Dessert iDayz1


Dessert IDayz6

Finally I made it!!! ...."the kumquat pudding".... and how did that happen? well if you ask me that.... i gotta see an amazing tiramisu dessert that was beautifully decorated with these tiny cuties:Kumquats. I had hardly noticed that this stranged named fruit even dwelled among the fruit aisles at the local super market. And each time I laid my eyes on it... I just knew that all I was just waiting for was for an occasion to give it a try. And yes, the occasion was my dear husband's birthday.... so somethings more sweeter than a cake.

I made this over basic milk pudding, decorated it with candied kumquats and topped it off with the thickened sugar syrup left behind from the candying the kumquats.... which gives its beautiful marriage between the unlikely tastes of the sweet & the bitter. All I can say that it was worth trying... for I got a thumps-up from my one I had made it for... my itchu :)

Thursday, April 23, 2009

Monday, April 20, 2009

Ice Cream Cake

Ice Cream Cake - iDayz

My latest cake endevour : "the Ice Cream Cake.... for my ever bubbly friend Fami's birthday bash and she loves ice cream.... So, the theme of the cake. The cake is classic white cake frosted with vanilla buttercream frosting and the ice cream cones done with cream cheese frosting.

Monday, December 15, 2008

iDayz In News

Collages3
iDayz had its debut in print news media on the 13th of December 2008.... the blog entry on the Homemade Carrot Wine appeared in the Mumbai edition of the leading daily newspaper in India "Times Of India". The post appeared under the name "Winery at Home" in the Rouge, the lifestyle supplement that comes with The Times of India.

For a closer look, click on the thumbnails below:

OnlyTimesOfIndia OnlyRouge OnlyWinery Only Wine

Thursday, December 4, 2008

Chicken Lollipop / Mock Drumsticks

Chicken Lolipop - iDayz"............spiced pulled back chicken winglets."
Chicken lollipops has always stayed among the top list of yummy appetisers while visiting an Indian restuarant. But I always shyed away from the idea of making it at home as sometimes you get to a notion that some stuffs are meant only by a professional chef. Its was the Matha Steward Show that got me on my spritis to give this sizzling appetised a try.

You'll Need...

Chicken Winglets.... 1 lb
Chilli Powder... 1 tbsp
Turmeric Powder... 1/2 tsp
Ketchup... 1 tsp
Salt... to taste.
Egg White, lightly beaten... 2 no:s
Bread Crumbs... 1 cup
Oil... for deep frying

Here Is How...

1. In a large non-reactive mixing bowl, combine the ingredients for chilli powder to salt to make up the marinade. Set aside.

2. Cut the wind as the two joints to yield three pieces and discard the tip portions of the wings. Wash chicken and pat dry with paper towels. With a sharp knife, loosen the meat around the middle joint & push the meat down gently, scrapping the bone, to about three-forths of the length. Turn the meat inside out around the big joint to form a "drumstick".

3. Transfer the chicken in to the marinate pan and toss to combine well. Cover with plastic wrap and marinate the chicken in the refrigerator for one to two hous, or overnight.

4. In a small bowl, place egg whites with a pinch of salt and beat until smooth. Place bread crumbs into another small bowl. Dip the pieces of chicken into the egg mixture and then in the mixturebread crumbs. Allow your chicken to sit at room temperature for about 10 minutes before frying.

5. Meanwhile, pour enough oil in to a deep skillet and set over medium-high heat and deep fry the "drumsticks" till crispy & golden brown. For heatier cooking options, either arrange the "drumsticks" in a large baking tray & bake for about 25-30 minutes in a 400F oven until crispy & golden brown or grill the "drumsticks" over hot coal for 8-10 minutes, until golden brown, or . Serve with desired dipping sauce.

Tuesday, December 2, 2008

Flower Cake

Flower Cake .jpg
Knock Knock at the door.... its a Surprise Birthday Party. I made this cake about half a year back as part of throwing a surprise birthday party for my friend Pam. The basket weave design is made from butter cream frosting & flowers are from royal icing.

Monday, November 24, 2008

Chatti Pathiri ...... "The Malabar Lasagnia"

Chatti Pathiri-iDayz.jpg

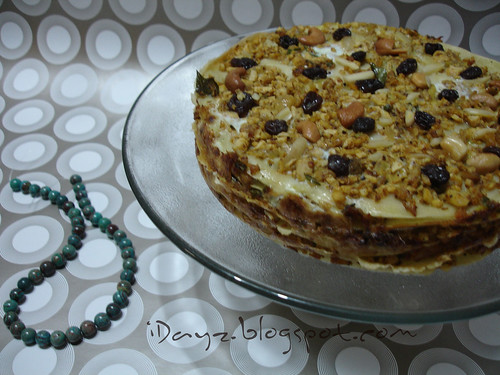
Sometimes the best of modern cuisine borrow ideas for the dishes & entrée from traditional cooking.... Chatti Pathiri a.k.a Chatti Pathil a.k.a Adukku Pathiri was just another strange name, that belonged among the rather long list of yummy sounding Malabar dishes, described to me by my friend "Famitha" who hails from the malabar region. Nothing... yes nothing gets my friend excited... not even fashion... and not even our usual gossip talks are good enough to gets her this excited than when talking about malabari food :). You Rock Girl!!! So this time she went ahead and described chatti pathiri as - the malabar lasagnia, similar as to the of layer upon layer of soft chapathi with the deliciously seasoned meat masala, eggs, cashew & raisins between the layers, and baked crispy perfection. I couldn't wait to get into the kitchen and try my hands in making Fami's chatti pathiri.

Traditionally, the baking of chatti pathiri is done in a sealed container with the coconut husk coals at the bottom and more on its lid which also has the added virtue of imparting a very delicate coco-nutty scent of its own to the dish baking crisp in the container. Although the traditional method of preparing them calls for placing them on hot coals, chatti pathiri may be prepared on regular oven or stove-tops.

You don't have to give up good tasting food to eat healthfully. Some smart choices can made in the original chatti pathiri recipe which would not only keep the calories under check but also save you a ton of time too. Rotisserie Chicken : shredded meat from the store bought rotisserie chicken may be used in place of the fried chicken called forth in the recipe. Egg Whites : each whole egg may be replaced with two egg whites. Tortillas/Chappati : the store bought tortillas/chappati makes a good alternative to homemade ones. Furthermore the chatti pathiri can be assembled ahead of time and stored in the fridge and then baked just in time for any feast. Fresh-baked chatti pathil would fill the house with tempting aromas, whetting appetites for any happy feast.
"Happy Holidays!!!"

You'll Need :

Chatti Pathiri Ingredients - iDayz For Ottada....
All Purpose Flour(Maida)... 2 cups
Egg, lightly beaten... 1 large
Salt... to taste.

For Erachi Pundam....
Onions, chopped... 1 large
Ginger, grated... 2tbsp
Garlic, grated ... 2 tbsp
Green Chillies, chopped... 4-5 no:s
Chilli Powder.... 1 tsp
Turmeric Powder... 1/2 tsp
Garam Masala... 1 tsp
Chicken, shredded... 1/2 kg
Curry leaves... 1 sprig

Between The Layers....
Eggs, beaten.... 6 no:s
Cardamom Powder... a pinch
Sugar (optional)... 1/2 tsp
Salt.... to taste.
Ghee... 200g
Shallots, sliced... 4 no:s
Cashews... 100g
Raisins... 100g
White Poppy Seeds(Khus-Khus)... 25g

For Ottada:

1. With a electric mixer over medium speed, beat the all purpose flour, egg and salt with required water to blend into a thick batter.

2. Set a flat non-stick pan over medium-high heat & make about 10-12 round thin crepe/dosa of uniform size (approx. about the same diameter as that of the baking dish). This forms the "Ottada" that makes the layers of the chatti pathil. Keep aside.

For Erachi Pundam:

1. Marinate the chicken in chilli powder, turmeric powder & salt for about 30 minutes. Heat oil and shallow fry the marinated chicken pieces till golden brown. Let cool & shred the fried chicken into fine pieces.

2. Set a bottom heavy Saute Pan on medium-low heat, heat oil and saute onions, minced ginger, garlic & green chili with a pinch of salt. Stir and cook till translucent or golden brown.

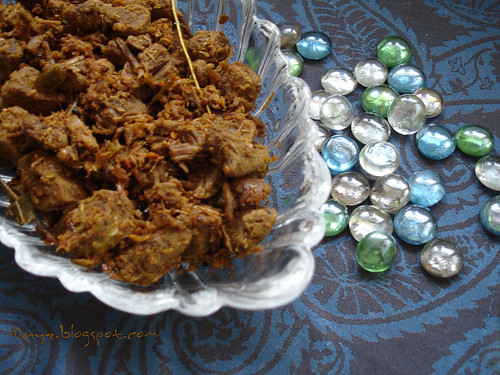
3. Add curry leaves, turmeric powder, red chili powder and coriander powder stir. Also stir in the shredded chicken. Sprinkle garam masala and roast for 5-10 minute and remove from heat. This forms the "Erachi Pandam" (Chicken Masala) that goes between the layers of the chatti pathil. Keep aside.

For Egg Mixture :

1. In a bowl, whisk together the eggs, cardamom powder, sugar and salt.

2. Heat ghee a small omelet pan & saute the thinly sliced shallots till golden brown. Remove from heat & cool and add it to the whisked eggs. This form the "Egg Mixture" that goes between the layers of the chatti pathil. Keep aside.

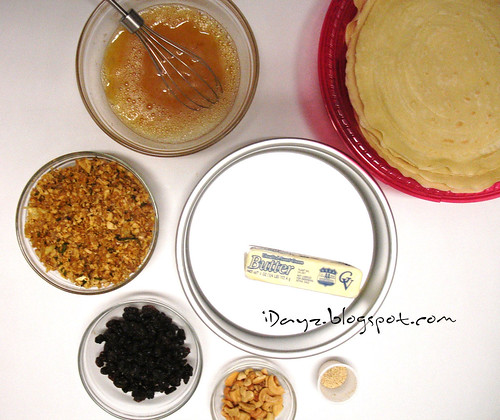
Assembling The Layers :

1. Preheat the oven to 350°F. Use about 1 tablespoon butter to grease the side of a round cake pan(8-inch) or any flat-bottomed oven proof dish.

2. Now start assembling the layers of the chatti pathil, starting with an initial layer of "Ottada" at the bottom of the pan... top it with a generous layer of "Erachi Pandam".... pour a layer of beaten "Egg Mixture".... sprinkle a few cashews, raisins & khas-khas.

3. Repeat the process by adding layers of Ottada, Erachi Pandam, Egg Mixture, Cashews, Raisins and Khas-Khas, in the order, till its done. On the top of the final layer, arrange a generous layer of cashews and raisins as garnish.

4. Close the pan with aluminium foil and bake in a 350°F oven for about 35-40 minutes till the sides have turned crispy & golden brown. Remove from the oven and keep aside for a few minutes till cool to handle.

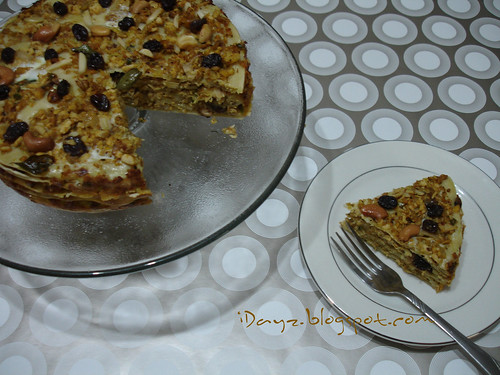
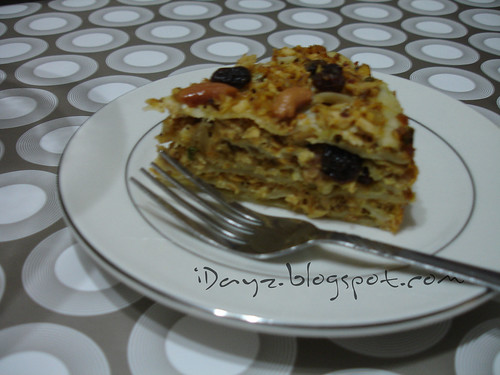
5. With a sharp knife, loosen the sides of the chatti pathiri from the pan and unmold the chatti pathil onto a serving plate. Serve hot either as a starter or as a main course.


Chatti Pathiri - iDayz1.jpg
Chatti Pathiri-iDayz 2.jpg

Saturday, November 1, 2008

Homemade Carrot Wine

Carrot Wine"Carrot Wine... a delicious orange coloured wine."

Ican never think about special occasions or celebrations at home without thinking about a special homemade wine. Months before the D-day my grandmother, mom and aunts would gather in the kitchen to celebrate the favorite tradition of creating the homemade wine which is to be serve for the occasion to friends and family. A small wine cup of homemade wine and a piece of fruit cake is served to guests to mark the start of any celebration and this has been a long standing tradition of hospitality among the Kerala Christians. Apart from the tradition part of homemade wines, creating your own wine and sharing it with family and friends is also a great sense of pride for any host. The varieties of homemade wine would range anything from Grape Wine, which is the most common... Beetroot Wine... Carrot Wine... Gooseberry Wine... Banana Wine... and to more rarer varieties like the Cashew-Apple Wine... JambakaChambaka(Water Rose Apple)Wine... Rose Petal Wine... Yes you read it just right; yes Rose Petal Wine which I look forward to making only if I could lay my hands on the much required rose petals which makes up the basic raw material. Just as interesting as this list of the homemade wine varieties get, my Hus T gets amused to be served various unheard varieties of wine as we go visiting our relatives during our much awaited yearly India trips. And so this time after we got back to US, I decided to try making them at home. Well only that I took quiet a while in deciding on the ingredient. Finally it was carrots that made it... Carrot Wine!!! Carrots have a natural sweetness, but lack acid. With the addition of some freshly squeezed juice of lemon and orange , carrots will make an interesting orange coloured wine. Making your own homemade carrot wine is a simple process and the following is the recipe for carrot wine.

Carrot You'll Need.....

Carrot, grated... 1 kg
Ginger, grated... 30g
Water.... 3.5 litres
Granulated Sugar.... 1 kg
Warm water.... ½ cup
Instant Yeast.... 1 tsp
Lemon Juice... 1 no:
Orange Juice... 1 no:
Cinnamon Sticks... 3-5 no:s
Cloves... 7 no:s

Here Is How....

1. Wash and peel the skin of the carrots & ginger and finely grate them using a hand grater.

2. Microwave ½ cup of water till lukewarm and dissolve a teaspoon of yeast and ½ teaspoon of sugar. Let it stand to bubble and rise. This process would revive the yeast cells prior to its use in the recipe.

3. Set a large Dutch Oven on medium-high heat and bring the water to a roaring boil. Add the grated carrots & ginger to the boiling water and boil it till its fully cooked.

4. When the carrots are well cooked, turn off the heat and let it cool off. Once the mixture cools to a temperature safe enough to handle, strain the mixture using a double cheesecloth or muslin cloth into a clean, dry and airtight container, preferably a traditional bharani. Discard the grated portion.

5. Into the wine liquid, add the sugar and the lemon and orange juice and stir with a clean and dry wooden spoon until fully dissolved. Once the wine liquid is cooled to body temperature, add the dissolved yeast froth, the cinnamon sticks and cloves.

6. Close the container airtight and allow to ferment. Store in a dry and dark space, during the fermentation period of 2-3 weeks(15 days). On the 5th day, stir the wine liquid using a clean and dry wooden spoon and let the fermentation to continue.

7. After the fermentation period is completed, strain it though a muslin cloth to remove any dead yeast and solid organic residues. Allow the cloudy liquid to clear before bottling. When clear, pour into dry bottles and store them at room temperature. Cheers!!!


Good Job Award

Wowie!!! I cant be more excited than when I'm getting my very first blog award : " GOOD JOB AWARD" for the latest blog entry on Homemade Carrot Wine. It was passed on to me by Ramya of Ramya's Kitchen Corner. And now I would like to pass this award to five of my fellow bloggers :


Vegan Month Nov 2008


November is Vegan Month!!! November 1st is the World Vegan Day, and all of November is celebrated as Vegan month. My fellow blogger Suganya of Tasty Pallets is hosting the blogging event : "Vegan Month, Nov 2008." And I'm submitting the entry of Homemade Carrot Wine towards this event.

Read more about Vegan Month at "Go Vegan"


Friday, October 10, 2008

Kansas Chicken.... A Diffrent Chicken Curry!!!


Kansas Chicken
Wondering whats with that name - Kansas Chicken??? What has Kansas, the central most state in United States Of America got to do with the name of an Indian Chicken Curry??? Well its not everyday that you get to scratch your head to name a yummy dish that you just finished making. :) But don't get me wrong on this, its not that I turned the magic wand and came up with this dish myself but its from the pages of my "Recipe Diary". Today I can say that I'm comfortable with cooking and to go a step further I have "iDayz", a food blog to my credit too. But it has not always been so, in the days before my wedding there wasn't a though as cooking that would get me all tensed up. Not that I was totally ignorant to cooking all those years but the though of not having my mom & beloveds around me to clear my seemingly endless doubts that would sprout each time I decide to put my culinary skills to test. And then, as most of you would have had it, I decided my best way would be write down every possible recipe that come my way from the mom & aunts. And when the time finally came to put my culinary skills to test I turned up my recipe diary, right to this recipe which Yeah this was the very first dish that I cooked for my sweet-heart. Simplicity to cook... yet so very different from the usual bandwagon of chicken curries.

You'll Need:

For The Marinade:
Chicken, boneless pieces...
Yogurt.... 4 tbsp
Turmeric... 1/2 tsp
Salt... to taste.

For The Masala:

Onions, finely chopped... 2 medium no:s
Ginger, finely chopped.... 1 inch piece
Garlic, minced.... 5 to 6 cloves
Green Chillies, finely chopped... 2 no:s
Garam Masala.... 1 tsp
Chilies Powder.... 2 1/2 tsp
Turmeric Powder.... 1/2 tsp
Coriander Powder(a little)... 1/2 tsp
Tomatoes, pureed... 2 medium no:s
Curry Leaves... 2 sprig
Oil... as required.

Here Is How:

1. Marinate small pieces of chicken with curd, turmeric & salt for 10 to 15 minutes.

2. Transfer the marinated chicken pieces, along with the marinade, into a wok and heat on medium-low heat till water starts oozing out and the chicken reaches a half-boil. Remove from the heat and strain the chicken pieces from the chicken stock and reserve the stock for later use in the recipe.

3. Pour the oil into a saute pan and set over medium-high heat. When the oil is hot, add the half-boiled chicken pieces and shallow fry till they starts to brown slightly. Keep the chicken pieces aside.

4. Into the remaining oil, add the chopped onions & salt. Stir & saute until the onion is translucent. Add ginger, garlic and green chillies and let them sweat for a minute or two. Add chili powder, turmeric powder, coriander powder and stir till the raw smell goes and then add the pureed tomatoes and keep stirring till oil separates.

5. Add the reserved chicken stock and bring to a simmer & then add the fried chicken pieces. Cover, reduce the heat to low, and cook for 5 minutes, or until the chicken are just cooked through. Remove the lid, stir once or twice, taste for salt, and serve.

Recipe Source : Dearest Daisy Chechi